VIPER MAX winch installation: Step by Step guide
If you have a UTV or a side by side, putting in a winch on the bumper is the first thing you do before jumping into the plow. Without a winch, a UTV isn't that good to do the types of jobs it does, and it won't satisfy you with its service. Once ready to open up the bumper and start putting the winch in, people get scared about how they are going to pull the job. In this article, I will share the step by step guide to install a Viper Max winch on your UTV.
Get the best winch for the money
Before I get to the installation guide, let's talk about what the winch you should get. If your UTV or side by side's GVWR (Gross Vehicle Weight Rating) is 3000 pounds, including the other weights, the Rating for your winch should be two times higher, which is 6000 pounds.
You can get to know the GVWR form the vehicle's chassis, now add up the loads you have on your car, such as the passengers, fuel, all the cargo. Once you've counted the mass, multiply that number by 2, and you have the winch weight rating you need. You can visit the viper winch review to get the best winch that matches your vehicle's type and GVWR.
Sometimes, you may get some confusion about choosing the best one from a winch and capstan. At this time, you should read some blogs and reviews on both products. Or you can search for the difference between these products. To get the best one among capstan and winch you can search by capstan vs winch on the internet that will give you the proper ideas about the best one.
Prepare the Vehicle
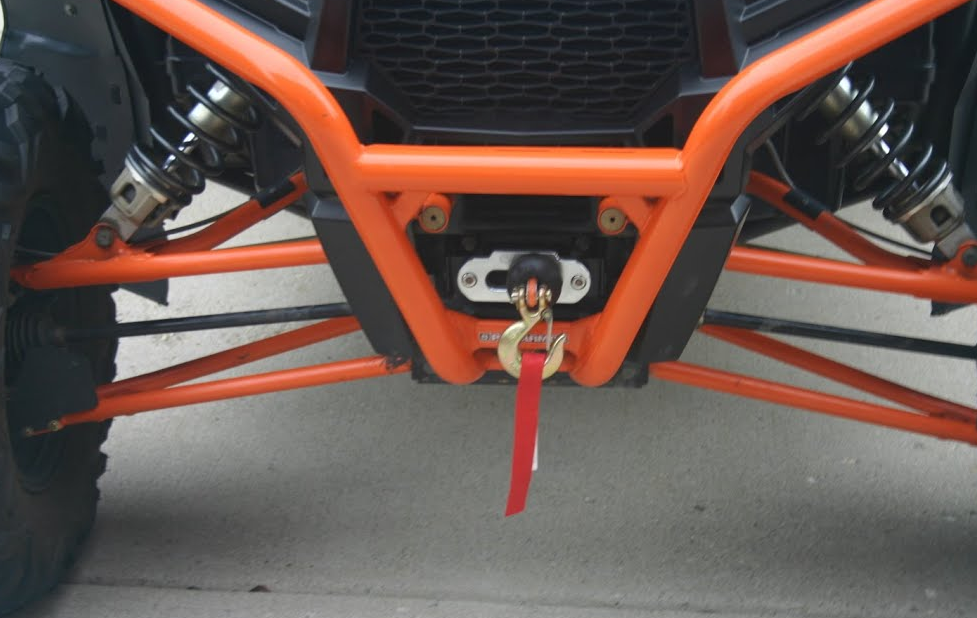
The first thing you need to do for installing the winch is to remove the front bumper of your ranger completely. There are at least four 15 mm bolts that hold on the bumper with the vehicle. Remove them to open up the bumper completely from the car, Keep the bolts organized on every stage. There should be a mounting place on the chassis to hook up the winch behind the bumper; the bolts could even be on the bumper itself as well.
Prepare the mounting plate
Once the bumper is open, get your hands on the winch box and take the mounting plate and the fairlead out of the box. Now take the fairlead and the bolts that come with it. Hook up the fairlead on the bumper and tighten up the bolts with a washer. You can use a power screw or bolt driver to both fasten the workflow and tighten the bolts.
Mount the winch on the bracket
Take out the winch mounting bracket out of the winch box, hand fit on the chassis, and see how many holes for the bolts are there. Now before you hook up the bracket on the chassis, mount the winch to it, using the 13 mm bolts that come with the winch. Take out the bolts and attach the winch on the bracket, again tighten up the bolts and screws so that they make the wich sit tight.
Mount the bracket
Now take the bolts and pour them up from the back of the bracket mounting holes. Take the whole bracket and push the bracket to the bolts, the bracket should snap right in without any struggle. Now take the washers and tighten them up, they are three on each side of the mounting bracket. The bracket should give you a sturdy, solid feel to hand once it's hooked up.
Tie up the cable and finish mounting
Now for the cable, you should go with synthetic rope as it comes with significantly less weight. The route in the winch's end of the cable through the fairlead and hook it up to the spool using the ball bearing, pull it and make sure it's tight.
Bottom line
It's time to reattach the bumper and wire the winch up, use the original bolts, and hook up the bumper. Once everything is attached, wire up the winch following the cable colors and the negative, positive indicators.
